I wanted to make a headboard for our room, and even had most of the supplies (more on that later), but I didn't have the piece that would actually make the headboard. So for our "anniversary," (Ben and I have been married for 6 months as of yesterday) we went to Home Depot and bought the materials needed to make it.
 |
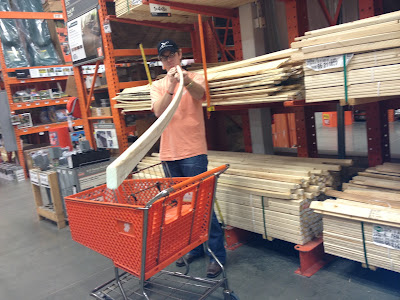
| Finding straight wood at Home Depot was a challenge. This is Ben showing one of the worst pieces. Look at that curve! |
So here is what we used:
A piece of Ecuaboard (no clue what this was, but it was lighter and about half the cost of plywood, so we went with that!)
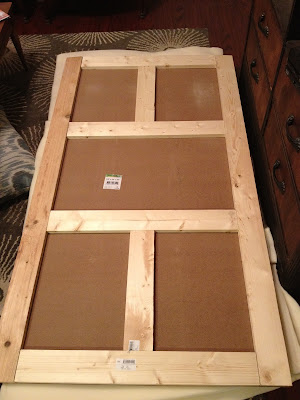
4 pieces of 2x4 that Ben cut down to frame the board to give it more stability
2 twin size egg crates
Fabric (previously purchased)
A staple gun with staples
Upholstery tacks and various nails
The project cost a little less than $100, including all the supplies we had on hand like the egg crates and the fabric. You could definitely do this cheaper by using a less expensive fabric or only using one layer of padding.
The project cost a little less than $100, including all the supplies we had on hand like the egg crates and the fabric. You could definitely do this cheaper by using a less expensive fabric or only using one layer of padding.
I bought 2 twin size egg crates for the padding.
The dimensions of the mattress topper were 37 1/2 x 73 1/2, and after measuring, I knew that I wanted my headboard to be 63 inches long (we have a Queen size bed for reference). Since I knew my padding was only 37 1/2 in wide, we decided to get our board cut to 63x35 (to leave room for wrapping the edges around). In hindsight, I would have cut it down to 30 or 31. We ended up having to leave the bottom part unwrapped (as far as the padding goes) because we wanted the top to be rounded and we knew the bottom wouldn't show. But it wouldn't be me if something didn't go wrong, right?
After we got home with all of our supplies, Ben got right to work cutting the frame and attaching it to the board (I cooked dinner and watched, in case you were wondering).
 |
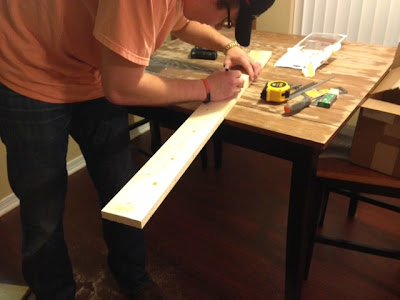
| Ben measuring and cutting the boards for the frame around the board. |
 |
| Ben attaching the frame to the board. |
 |
| The finished back of the board. Ben framed it for extra stability. |
 |
| Draping the padding over the board and finding out that we couldn't wrap it all the way around the bottom! |
 |
| Stapling in action! |
 |
| Close up of the egg crate stapled around the board. |
We just pulled the fabric super tight and put a crap ton of staples to hold it in place. We made sure that the corners were nice and sharp, and even had to go back and add MORE staples to keep the edges uniform and non-bumpy all the way around. (The double egg crate made for a sometimes non-uniform surface, so it may be better to just use one piece of solid foam to get an even surface).
I have had this fabric sitting around for quite some time now-almost a year and a half, actually! I bought it 2 summers ago to cover some yard sale chairs and never got around to having them covered. It was actually pretty expensive, so that drove the total cost of this project up, even though I have had the fabric for a while.
 |
| The finished product. What do you think?? |
My next project is to upgrade the bedding. I want to pull some of the yellow in and get a new bedspread-still a neutral, just maybe a little more plush. I also want to add something over the bed. I have a couple ideas, but what do you think? What should I put above my bed?
Linking up with: Young House Love , This Gal Cooks, I Gotta Try That, and Northern Belle Diaries.


Totally jealous of your craftiness!!!
ReplyDeleteThanks for linking up! Check out my Confessions party tomorrow on my blog!
www.confessionsofanorthernbelle.com
I love the fabric that you used so much!! I tried my hand at making a headboard for this challenge too. I love how they change up a room :)
ReplyDelete